
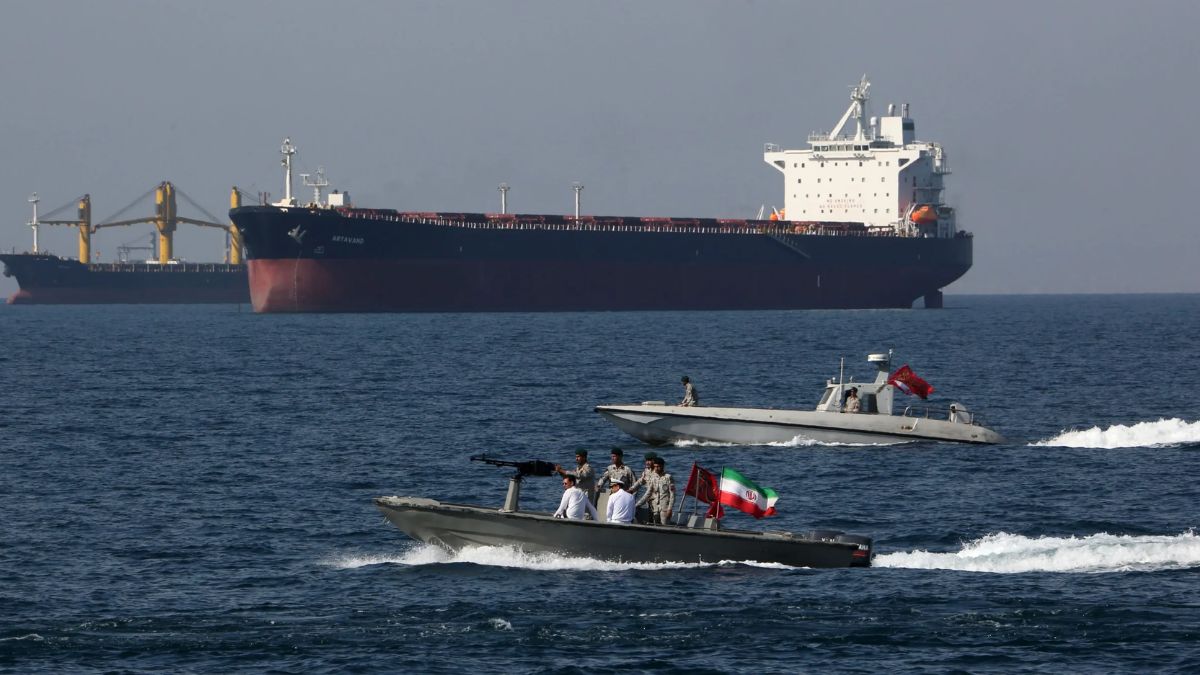
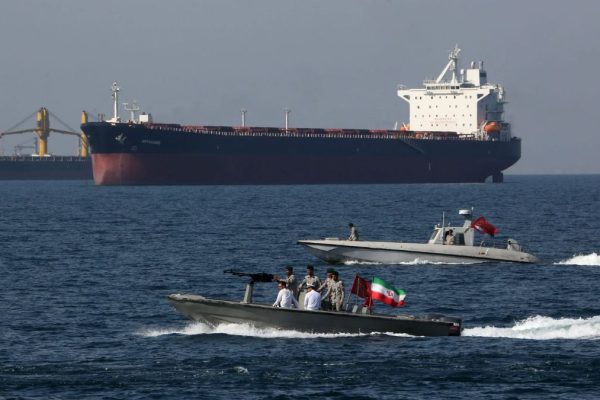
US Navy plans escort for supertankers and cargo ships through key waterway amid rising Middle East tensions
The United States Navy is preparing to assist nearly a dozen commercial vessels, including supertankers and major container ships, as...


Latest News
ALL NEWS → TV
TV The Devil Wears Prada 2 crosses 600 million dollars at global box office
 US MARKETS
 European Natural Gas falls 5.6% as Iran US peace hopes ease energy supply fears May 25, 2026
 US MARKETS
 Gold price climbs above 4560 as Iran US peace talks pressure oil markets May 25, 2026
 US MARKETS
 Agriculture commodities price today, May 25: Orange Juice jumps nearly 3% while Cocoa extends deep long term crash over 60% May 25, 2026
 WORLD
WORLD Trump plans high level call with leaders from Saudi Arabia, Qatar, UAE, Egypt, Turkey and Pakistan
Former US President Donald Trump is expected to hold a call on Saturday with several important world leaders.…
May 23, 2026


 TECH
TECH Trump Mobile data leak sparks privacy concerns after company admits user information was exposed
Trump Mobile is facing growing criticism after admitting that customer information became publicly accessible online. The issue came to light...
May 22, 2026


Kevin Warsh rate cut expectations rise after Bessent backs Fed’s inflation and growth approach May 22, 2026

Oil prices tumble over $2 as US Iran deal draft eases Middle East supply fears May 21, 2026

US stock market today, May 21: Nasdaq slips 0.57% as Dow and S&P 500 turn red May 21, 2026

Agriculture commodities price today, May 21: Cocoa plunges 62% YoY as potatoes surge 704% May 21, 2026


Apple and OpenAI partnership faces legal tension as ChatGPT deal reportedly falls short of expectations May 14, 2026

Samsung Galaxy Trifold could bring major S Pen upgrade in surprise feature leak May 11, 2026

TikTok launches ad free subscription plan in the UK for £3.99 per month May 11, 2026

Angry Birds enters World Video Game Hall of Fame nearly 15 years after global launch May 7, 2026

Google launches Health Coach with premium plans: See price! May 7, 2026
Lifestyle
MORE →
Energy price today, May 8: Crude oil at $95 and gasoline jumps 101% YTD May 8, 2026

Charli xcx set to attend Met Gala 2026 sparks fan excitement May 4, 2026

Casper the Friendly Ghost live action series in development at Disney Plus Apr 29, 2026


The impact of global news on oil trading decisions Apr 11, 2026

Why Brent Crude is used for inflation hedging Apr 11, 2026
Sports
MORE →
FIFA projects $11 billion revenue from 2026 World Cup, aims for football development May 14, 2026

FIFA overhauls disciplinary regulations for 2026 World Cup to prevent player suspensions Apr 29, 2026

NFL media deals under scrutiny as Justice Department probes sports shift to streaming and ad revenue impact Apr 23, 2026


The Mandalorian and Grogu opens with 33 million dollar domestic box office debut
The Mandalorian and Grogu has opened its theatrical run with a 33 million dollar domestic box office collection on its...
May 23, 2026
Drake makes UK chart history with three albums simultaneously in top 10 May 22, 2026

First look at Absolute Clayface revealed in Absolute Batman universe May 22, 2026

Scary Movie 6 reveals The Substance and Get Out parody posters ahead of horror comedy return May 18, 2026

First poster for Adventure Time: Side Quests reveals young Finn and Jake in Hulu prequel series May 18, 2026

Why Wired Earphones Still Have a Place for Music Lovers May 17, 2026

Is Off Campus Season 2 happening? Everything we know so far May 14, 2026

Scarlett Johansson officially joins ‘The Batman Part 2’ cast in major new role May 14, 2026